Access CRM
Learn how to access CRM to contact applicants.
Note - The section described below is only visible to members with roles of
Admin,HRandOwner.
The June 2025 update adds a Candidate Relationship Management (CRM) feature that can be used to send notifications to applicants using customizable email templates and to track the outreach process using editable tags.
Candidate Relationship Management (CRM) software is vital for improving candidate communication, employer branding, and hiring efficiency.
There are 2 ways to access the CRM:
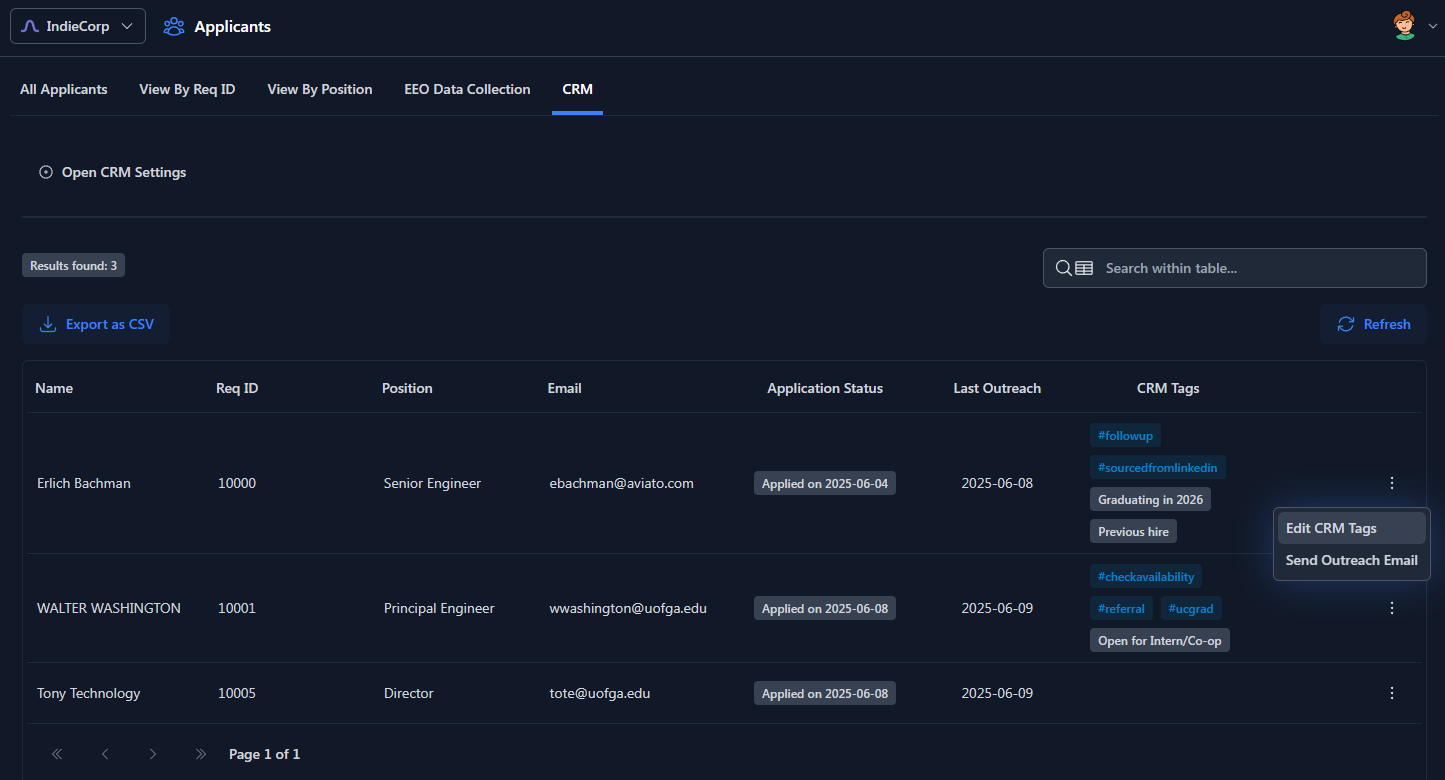
1. CRM tab under Applicants section: This is the entry point for accessing CRM for each applicant. The table in this page lists all the applicants and CRM tags associated with them. Clicking on the applicant name will redirect to the applicant-specific CRM page which can be used to contact the applicant.
2. Using the Open CRM button above resume on applicant info page: This will redirect to the applicant-specific CRM page.

Applicant-specific CRM page
This page contains a contact form that is prepopulated with necessary info and uses email templates to build the subject and body of the email that is to be sent out to the applicant.
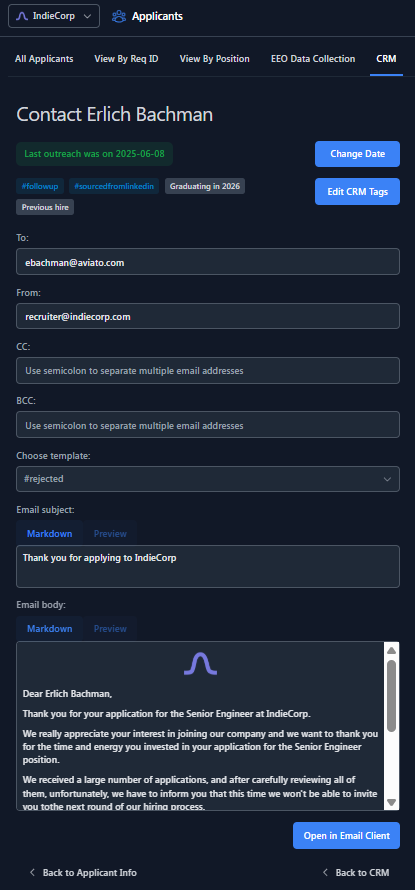
• The last outreach date can be modified whenever an email is sent to the applicant in order to track when the last communication with the applicant took place.
• As part of CRM new fields named CRM Tags are being introduced which can be used to store hashtags and comments about the candidates.
• The To and From fields are prepopulated while the Cc and Bcc fields can be customized by adding a semicolon separated string of email addresses.
• The template option is initially populated with default #received and #rejected email templates. Additional templates can be created
as explained in next section. Selecting a template here will populate the subject and body fields below automatically.
• The subject and body fields are customizable when the markdown mode is turned on by clicking on the Markdown tab above the textbox. Preview mode shows
what the HTML rendered view would look like.
• The button Open in Email Client can be used to download the rendered email as a send.eml file that can be opened in an email client such as
Outlook or Thunderbird.
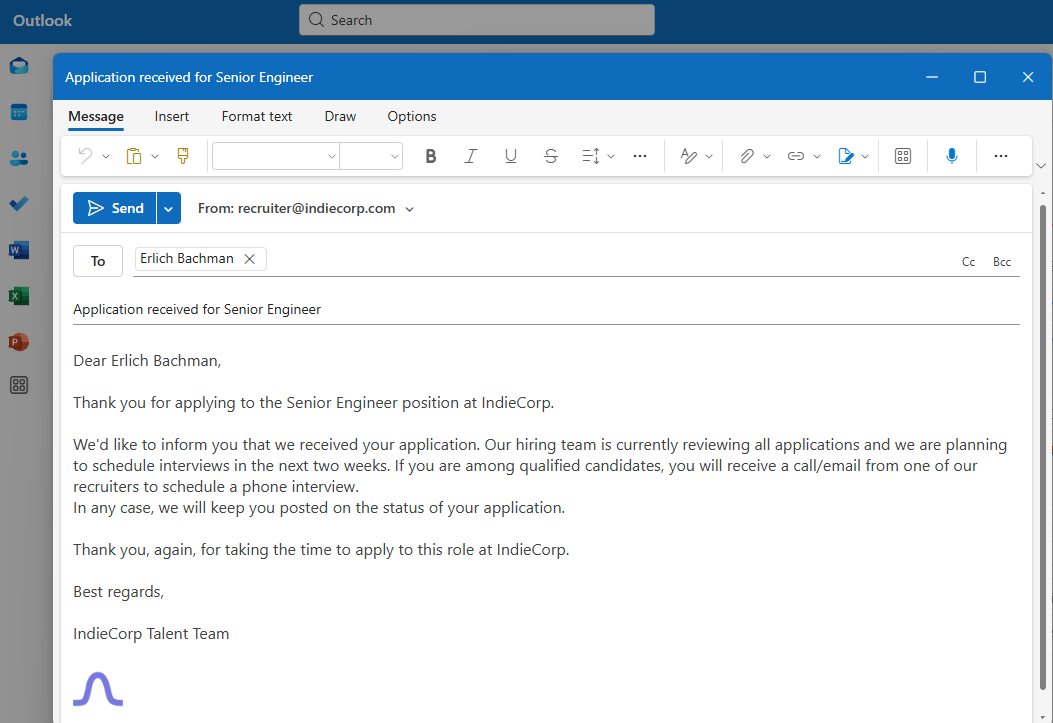
For example, when Outlook has been configured as the default email client then clicking on the downloaded send.eml file will launch Outlook and place
the contents of send.eml into the compose window as shown below:
Customizing email templates
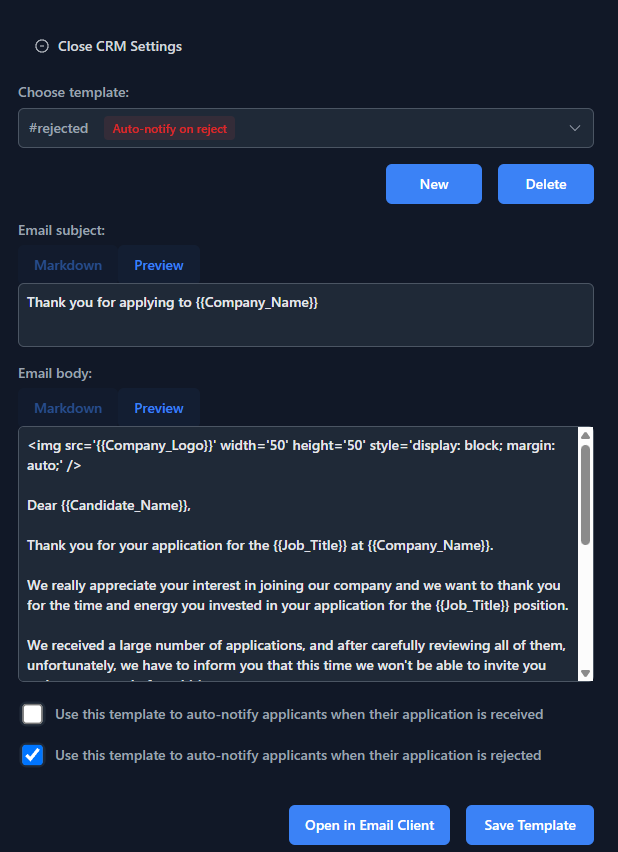
Email templates can be customized using the Open CRM Settings button above the CRM table.
This opens a form that allows creation, deletion and modification of email templates. There is a limit of 10 imposed on number of templates that can exist under an organization.
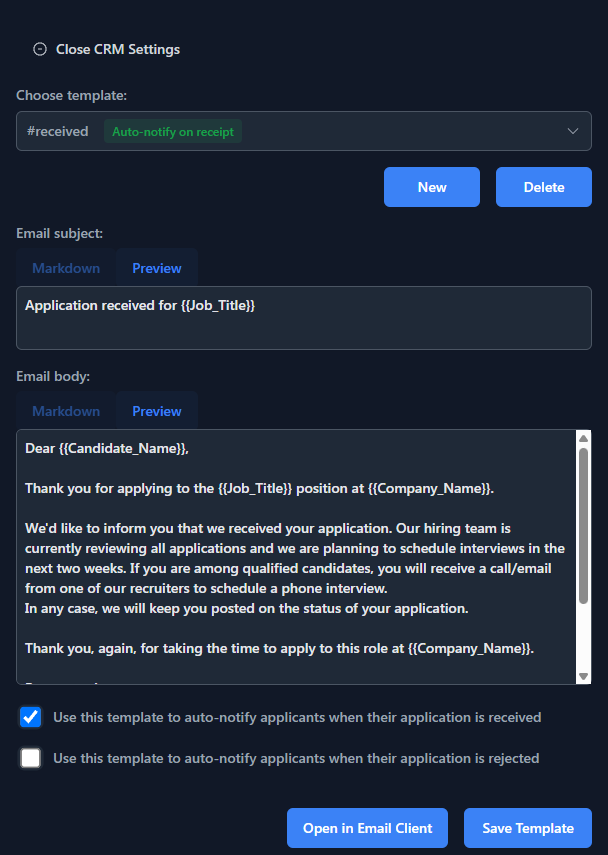
Auto notification emails can be sent to applicants when their applications are received or when their status changes to Rejected. The checkboxes below
the templates can be checked to enable such auto notifications. The actions for which the auto notifications will be triggered will be indicated next to the
template name for quick identification.
Note - Auto notification emails will be sent on behalf of your company using the same SMTP server that HireNorm uses for sending invites. For all other emails built using the CRM templates an email client will need to be used to send the emails.
For example, the below template will be used to send automatic notification emails when the applicant's status changes to Rejected.
Template variables
The markdown syntax used for the template can be augmented with template variables in order to make them generic. The following template variables are supported:
| Template variable | Will be replaced with | Availability |
|---|---|---|
| {{Candidate_Name}} | Full name of the applicant | All templates |
| {{Candidate_FirstName}} | First name of the applicant | All templates |
| {{Candidate_MiddleName}} | Middle name of the applicant | All templates |
| {{Candidate_LastName}} | Last name of the applicant | All templates |
| {{Candidate_Email}} | Email address of the applicant | All templates |
| {{Company_Name}} | Name of your company | All templates |
| {{Company_Logo}} | Your company's logo URL | All templates. Logo can be set by visiting Settings -> Organization -> General -> Organization Logo and uploading an image |
| {{Company_UUID}} | UUID of your company | All templates |
| {{Company_ID}} | ID of your company | All templates |
| {{Job_Title}} | Job title that applicant has applied to | All templates |
| {{Job_ReqID}} | Req ID of the job that applicant has applied to | All templates |
| {{Job_Link}} | URL of the job that applicant has applied to | All templates |
| {{Sender_Name}} | Display name of employee sending the email | Only available when used via applicant-specific CRM page |
| {{Sender_Email}} | Email address of the employee sending the email | Only available when used via applicant-specific CRM page |